2stitch Organizer User Manual
Adding designs
You can now either drag and drop your embroidery file folder on the left side panel or use the Add folder button in the toolbar to open it.
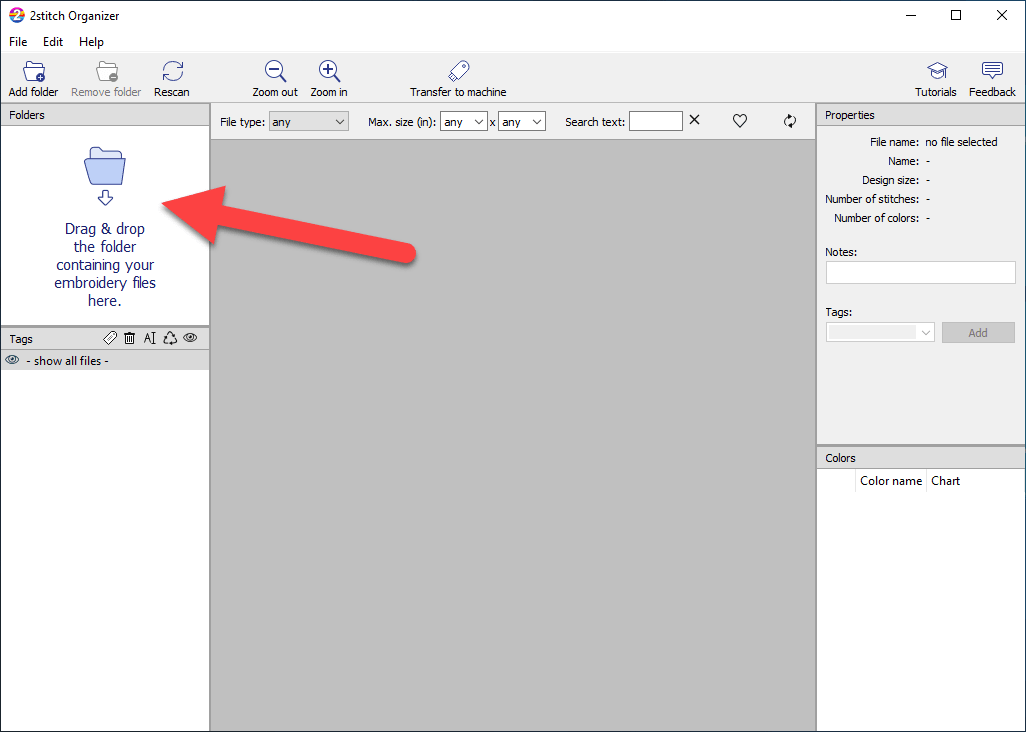
The organizer will take some time to read all your files. After that you should see the designs in the center view:
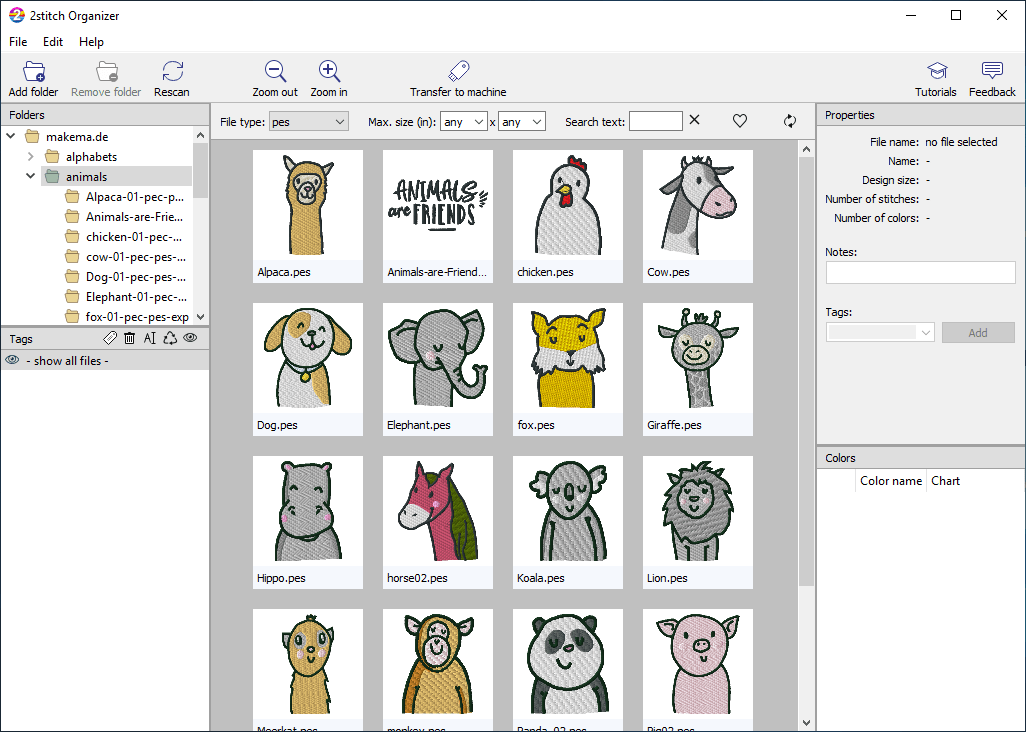
If you add more designs to your library use the Rescan button to search for new designs in your design folders.
The center view shows your designs.
The view is empty if
- You've not yet added any designs (see above: Adding files)
- 2stitch Organizer found no supported file formats
- You've set a filter (see below) that hides all your files
Double click on a design to see a big preview of it.
Organizing designs
2stitch Organizer comes with a bunch for options to organize your designs:
- Folder
- Tags
- Favorite
- File type
- Size
- Text
Folders
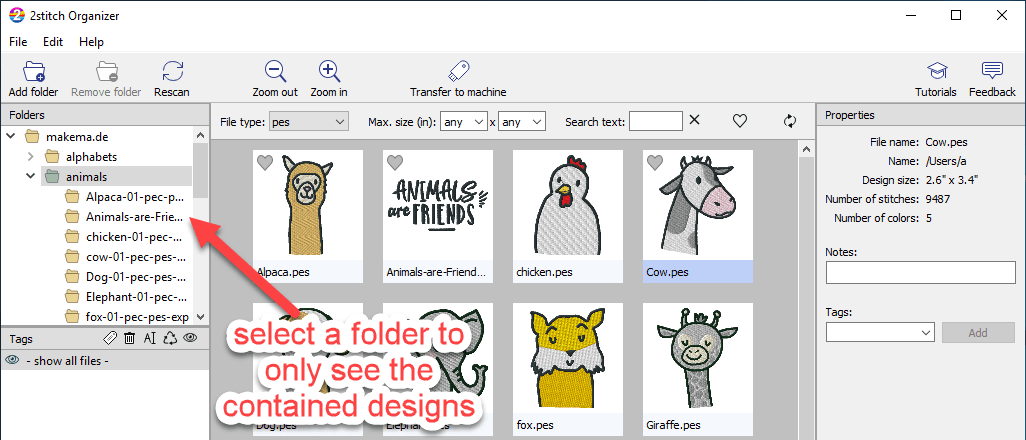
2stitch Organizer displays the folder structure in the left sidebar.
Select a folder to only see the designs in this folder its subfolders.
Filtering by file type
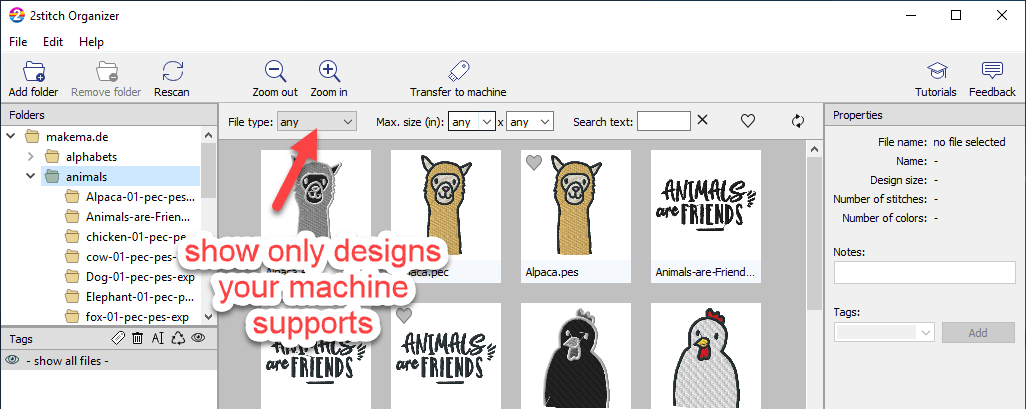
2stitch Organizer displays all design files by default. Designs usually come in several formats such as PES, DST, EXP and more. You surely only need one of the formats for your machine. But I'd not recommend throwing the others away — you never know which one you might need in the future...
Simply select the format you want to see in 2stitch Organizer and hide all the others:
Favorites
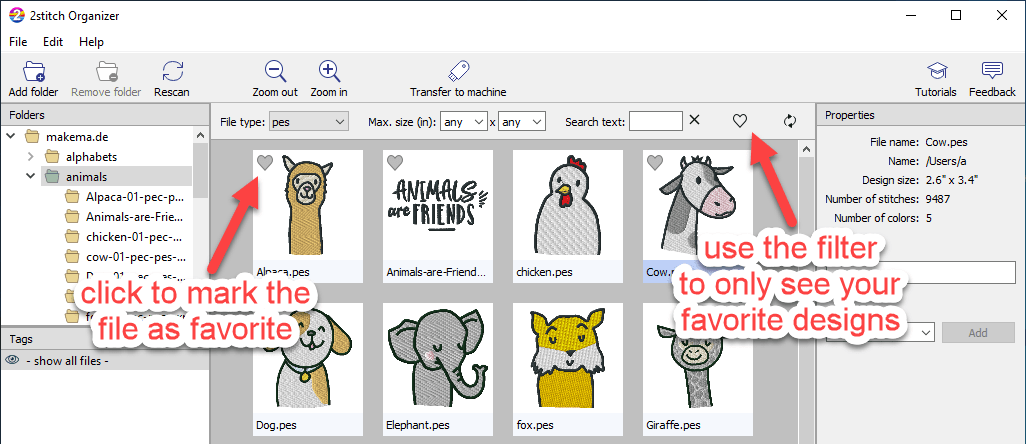
Favorites are a fast way to mark the designs you like most. Simply move the mouse pointer over the design and a small heart-shaped icon appears in the top left corner of the preview image.
Click on the heart icon to mark the embroidery file as favorite.
Use the heart icon in the filter bar to only show your favorite files.
Tagging
Tags are the best way to organize your designs: You can simply assign as many tags as you want instead of putting your designs in a folder — searching for it and never knowing if Santa is in Christmas or Winter...
E.g. Santa Claus: You can put it in all of these
- Winter
- Holidays
- Christmas
- Human
- Vintage
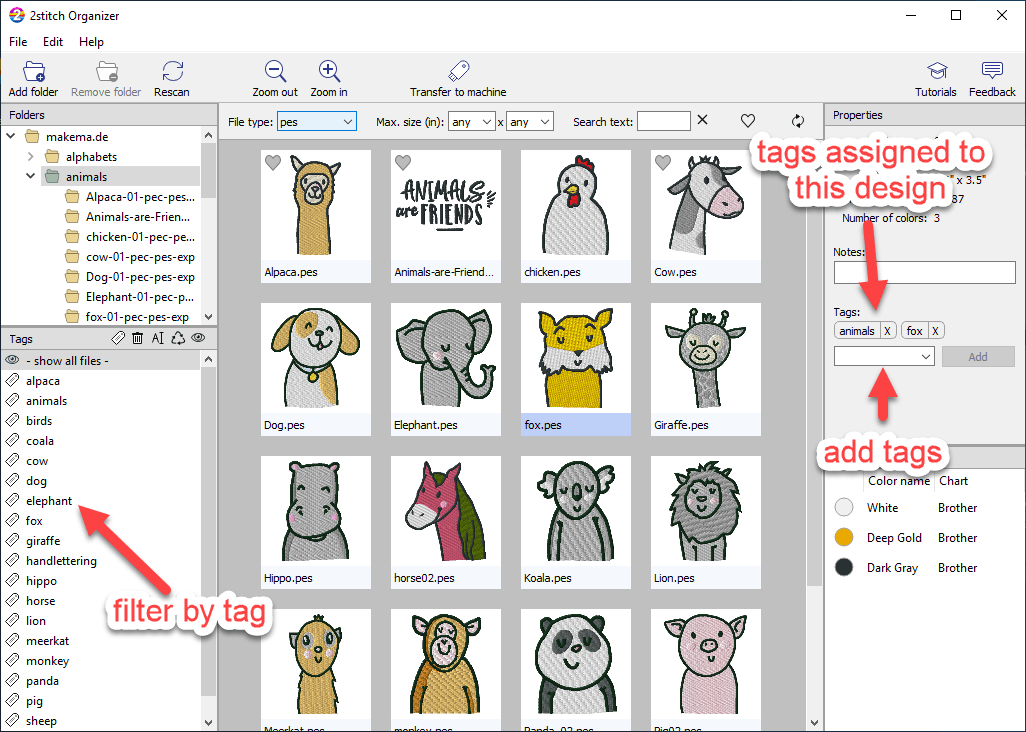
Select the design or designs your want to assign a tag to in the center view. Use the small drop down box in the right sidebar to select an existing tag — or type the name of the tag you want to create.
You see tags assigned to a design in the Tags category of the right side bar. Use the X on the right side of the tag to remove it.
To only see items that match a tag use the tag list on the left. The first item -show all files- disables the tag filter and returns to the normal view.
Adding notes
Sometimes it's useful to add some notes to your designs:
- Where did I buy this?
- Were there any problems with the machine?
- What license does it have?
- Which stabilizer did I use?
This is exactly what the note field is for. The notes field is on the right side bar. The field automatically grows if you enter longer text.
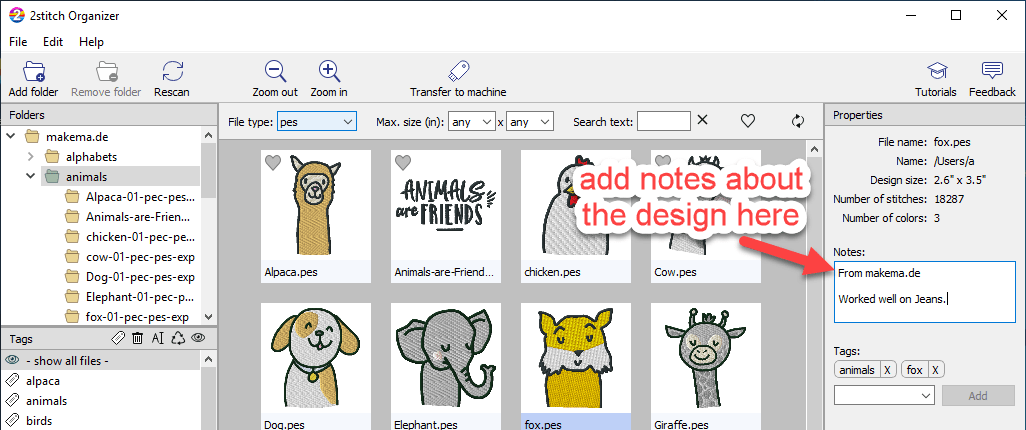
You can use the field Search text in the search bar to search for notes.
Filtering by size
Use the Max. size field in the search bar to search exclude designs that are too big. Btw. you can switch between imperial units (inch) and metric units (cm) in the preferences (Menu: File -> Preferences).
Transferring designs to your embroidery machine
Most embroidery machines use USB sticks. If you buy a new USB stick, it's most likely already in a format that your computer and embroidery machine can read.
If you've installed 2stitchOrganizer in the chapter before, it's straightforward to transfer the designs:
Select the designs in the center view. You can do this by
- clicking on the designs while holding the CMD key (Mac) or CTRL (Windows)
- using a so-called rubber band selection: Press the mouse somewhere on the background of the center view and drag your mouse. You should see a rectangle, and all the items inside it get selected.
If you've filtered your designs, you can also press CTRL-A (Windows) or CMD-A (Mac) - or use Select All from the menu.
Click on the Transfer to machine button in the toolbar and select your USB stick. Press Copy.
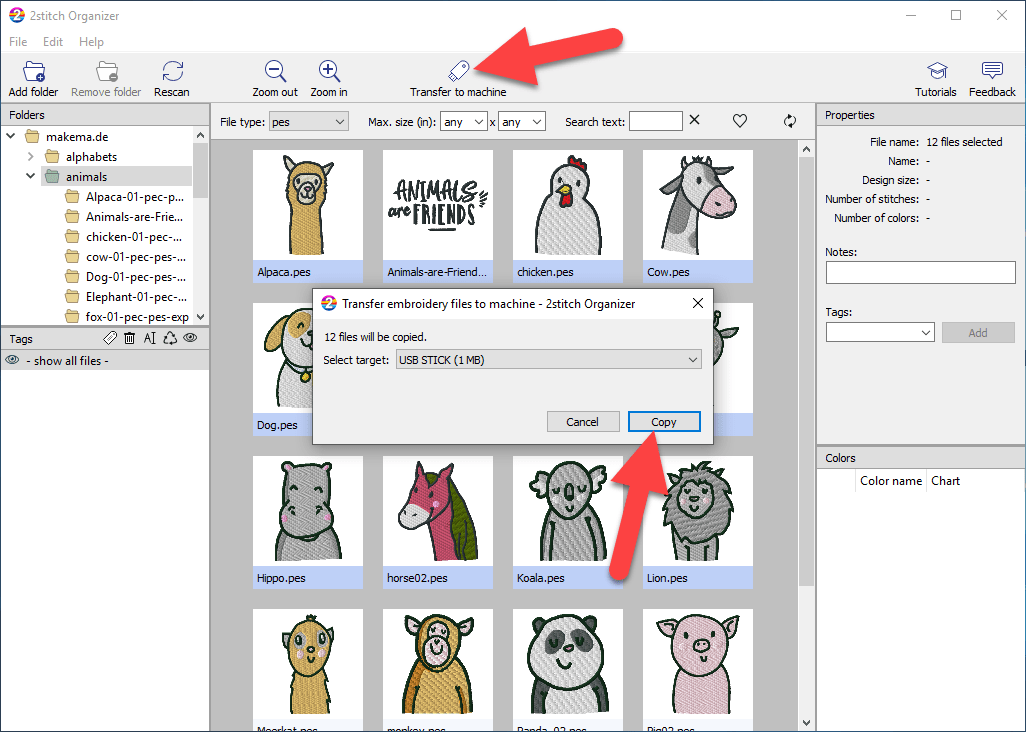
It might now take some time until your design files are transferred - depending on the number of designs and your computer speed.